This Christmas I was determined to use some of those books to make one of the wreaths or trees made entirely of sheet music that I've been admiring on blogs and Pinterest the last couple of years.
I won't say this was a quick craft. Thank heavens I settled on covering a 10" styrofoam cone and not an entire wreath! ~
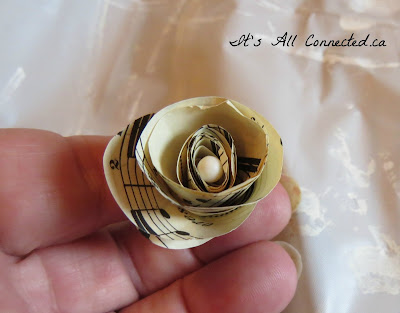
The process is simple, but it does take a few practice shots to get the roses shaped nicely.
My music pages were 12" X 10" each and I cut them into four sections. I stacked the four sections so I could cut them all at once and rounded the corners to make the rough shape of a circle. Then, I cut a spiral into each circle. ~
Be sure to leave a round piece at the end of the spiral. You will need it to push a pin through when you assemble your tree. ~
Stick a pearl topped straight pin through the centre of the rose and make sure it has gone through the centre of the round piece that is now covering the bottom of your rose. ~
Stick the pin into your styrofoam tree. I added a dab of hot glue to my roses to make sure they stayed put, what with grandkids and cats that are sure to be touching them. ~
If you are as lucky as I am you will have a supervisor for the assembly process. I feel I should put an 'inspected by Clara Jane' label on my tree. ~
Keep on cutting and rolling, pinning and gluing for the next four days until you have the whole form covered. I cut the sheets into smaller sections to decrease the size of the roses as I moved toward the narrow end of the cone. At this point I'd stabbed myself with the pins and burned my self so many times with the glue gun that I was seriously considering handing the whole project over to Clara Jane to finish! Instead, I roped my friend Wendy into rolling some of the roses.
You won't need to finish the bottom of the styrofoam form unless you are attaching it to a base that raises it up. I was putting mine on a hand turned wooden base that I had in my stash and some of the white styrofoam on the bottom showed, so I added a bit of fringed trim to cover that up.
That brought the whole decoration up to 19" tall and makes a showy piece for my Christmas decor.
There are lots of musicians, professional and amateur in my family and I'm hoping they love this ode to music as much as I do! ~
I'm sharing this with:


No comments:
Post a Comment